When multiple developers are working on the same project, it's good to have a code review. SonarQube is a tool through which we can evaluate our code. Here, for demo purposes, we are going to evaluate the web API which is built on .NET Core.
Let's see step by step implementation.
In order to run SonarQube, we need to install JAVA in our local system.
Refer to the below link to download JAVA installer and install JAVA.
https://www.oracle.com/technetwork/java/javase/downloads/index-jsp-138363.html
Configure the 'PATH' system variable under environment variables
Go to Control Panel > System > Advanced System Settings, it will open the System Properties window.
Click on the "Environment Variables" button.
Click on the "View" button under User Variables.
Give the variable name as 'JAVA_HOME'.
The variable value will be your JDK path where you installed JAVA.

Select path variable under system variable and click on the "Edit" button.

Add a new path as mentioned below and click the "OK" button.

SonarQube Server Installation
Download SonarQube from https://www.sonarqube.org/downloads/
Extract it in one of your local drives like D:\sonarqube-7.6.
Run the Command Prompt as Administrator. Go to the extracted path and run StartSonar.bat.
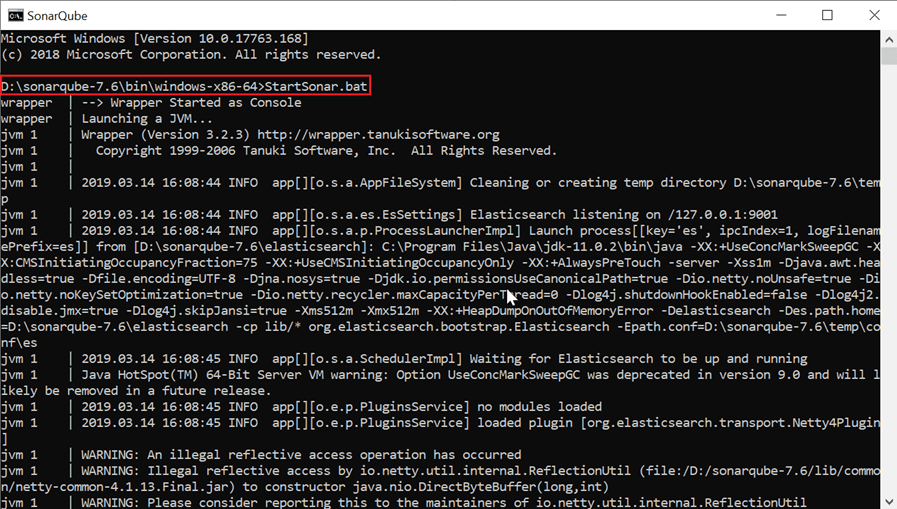
SonarQube server is started locally.
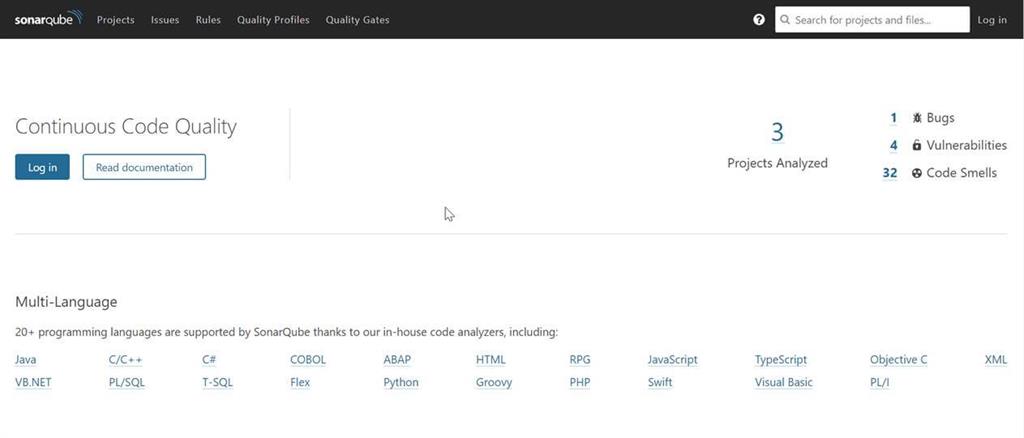
In order to verify the same, browse http://localhost:9000 in the browser and you will be able to see the landing page of SonarQube.
Default UserName and Password is admin,
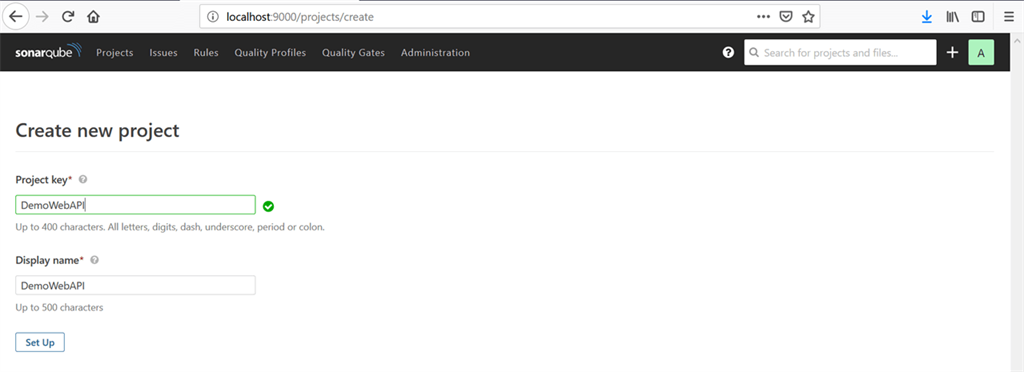
Creating a Project
Click on the project in the main menu. Click on + button mentioned on the right side of the page and click on "Create New Project".

Provide the project key and display name.
Click on the "Set Up" button.
Click on the "Generate" button to generate the token.
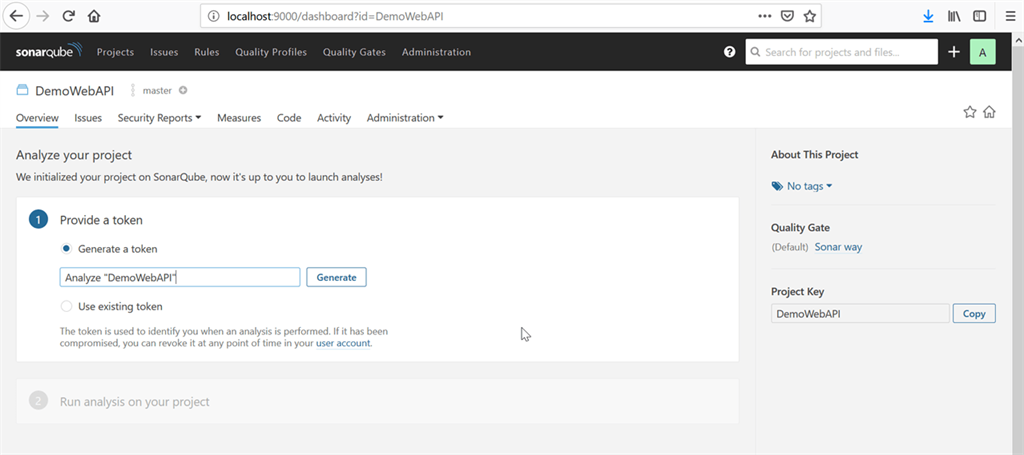
A token is generated and you can make a note of that for future use.
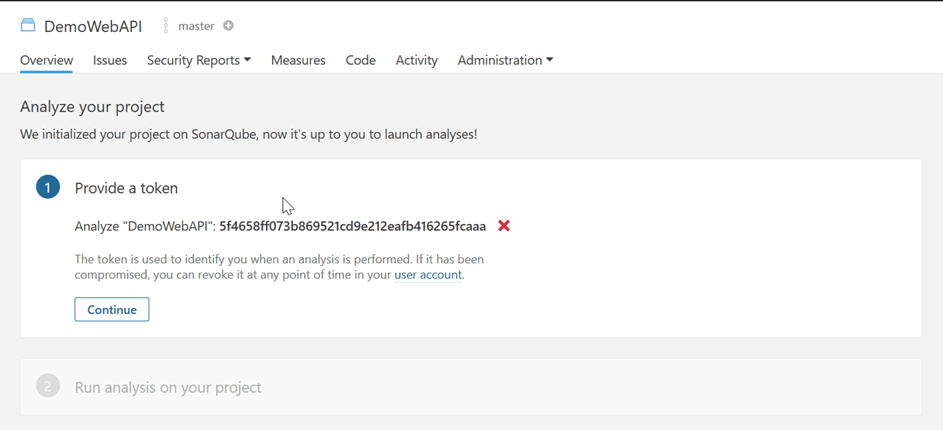
Click on the recently created project and click on "Overview".
Provide the recently created token.
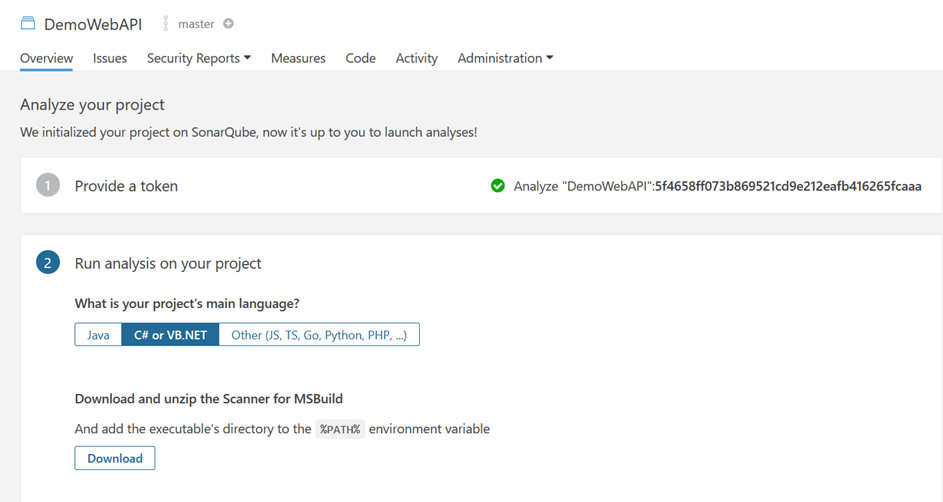
In the next step, select your project language and click on "Download" to download the Scanner for MSBuild.
Evaluate an Application by SonarQube
Extract it in one of your local drives like D:\sonar-scanner.
Run the Command Prompt as Administrator.
Now, here, I am assuming that you have your application, i.e., Web API in .NET Core is ready. If you don't have and you want to test with SonarQube, then you can download any .NET Core Web API project from https://github.com/akshayblevel?tab=repositories
Execute the below command sequentially.
dotnet E:\sonar-scanner\SonarScanner.MSBuild.dll begin /k:"{token-created while creating project}"
dotnet build D:\Akki\POC\DemoWebAPI\DemoWebAPI.sln
dotnet E:\sonar-scanner\SonarScanner.MSBuild.dll end
Check the evaluation result
Run the SonarQube page http://localhost:9000
Click on your project and you will be able to see the code analysis result on the page like the number of bugs, vulnerabilities, code smells, code duplication etc.
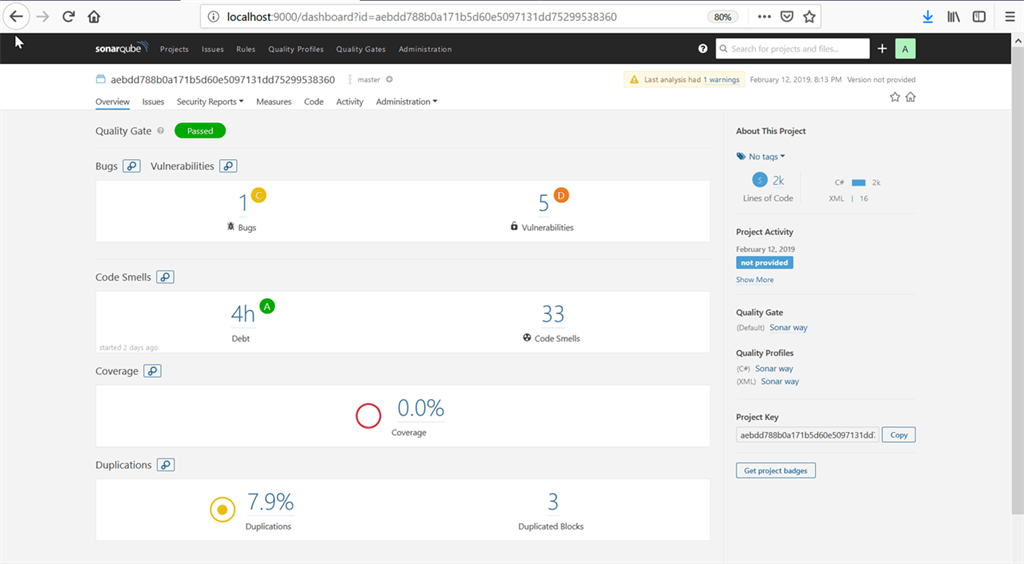
Click on each link and you will get all the details with file and line numbers, it will also suggest the solution to resolve that.
Comments
Post a Comment